

Waterwell Application User Guide
Introduction
Welcome to Waterwell! This user guide will walk you through the process of using the Waterwell mapping tool. You will learn how to search for a well and add a new well to the system. To quickly find the information you need, refer to the table of contents above.
User Information
Logging In

Figure 1
To log in to Waterwell, follow these steps:
- Click on the 'Login' button located at the top right corner of the screen (Figure 1).
- Enter your login details.
- Click on the 'Login' button to proceed.
Logging Out
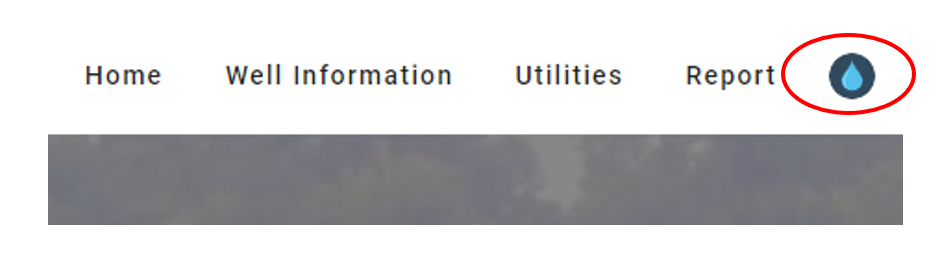
Figure 2
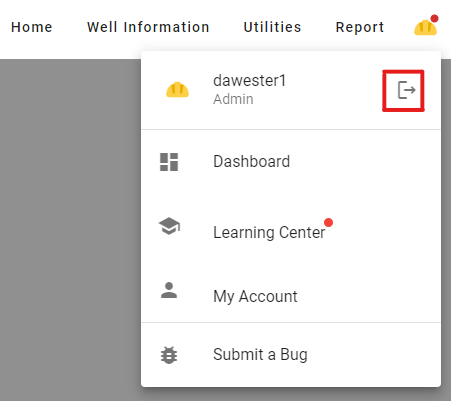
Figure 3
To log out of Waterwell, follow these steps:
- Click on the water drop icon at the top right corner of the screen (Figure 2).
- In the drop-down menu, click on the 'Logout' button (Figure 3).
Forgot Your Password
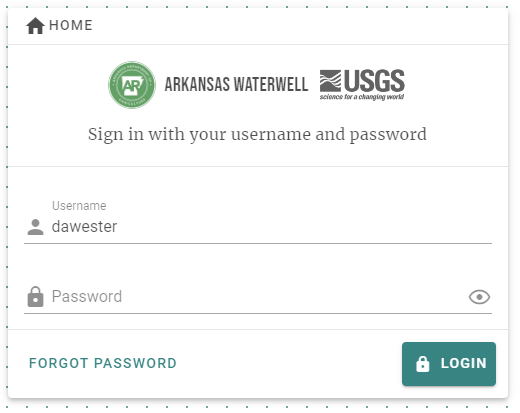
Figure 4
If you have forgotten your password, don't worry! Follow these steps to reset it:
- Click on the 'Login' button.
- In the bottom left corner, click on the 'Forgot Password' button (Figure 4).
- Enter your information and click on 'Reset Password'.
- You should receive an email with instructions to reset your password.
View/Change Your Account Details
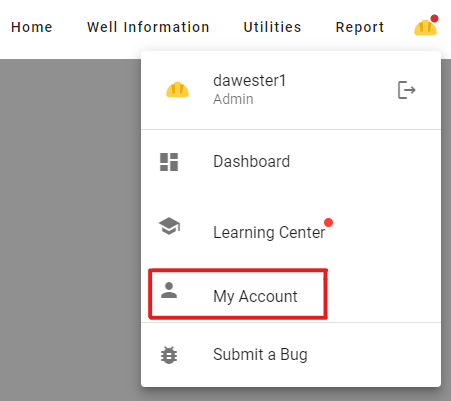
Figure 5
To view or change your account details, use the following steps:
- Click on the water drop icon.
- Select 'My Account' from the drop-down menu (Figure 5).
- You will see your account information (Figure 6).
- To make changes, fill in the desired fields and click on 'Update Account' at the bottom right.
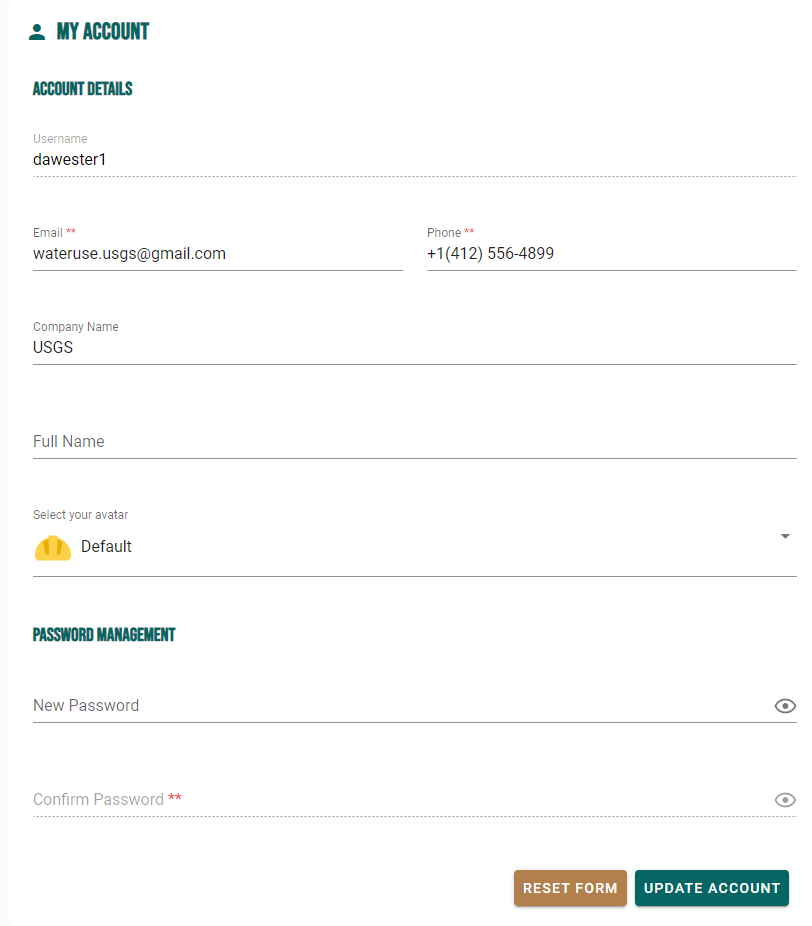
Figure 6
How To Use the Mapping Tool and Adding a Well
Starting the Mapping Tool
Figure 7
To access the mapping application:
- Click on the 'Well Information' drop down menu.
- Select 'Map Search' from the options.
Searching for a Well
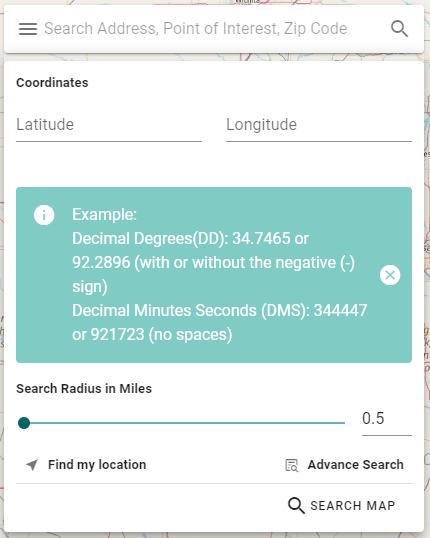
Figure 8
To search for a well, use the following steps:
- Click on the input box located at the top left of the screen (Figure 8).
- Enter an address, coordinates, or a zip code.
- Adjust the search radius to widen or narrow your search area.
- Use the 'Find My Location' feature to search near your current location.
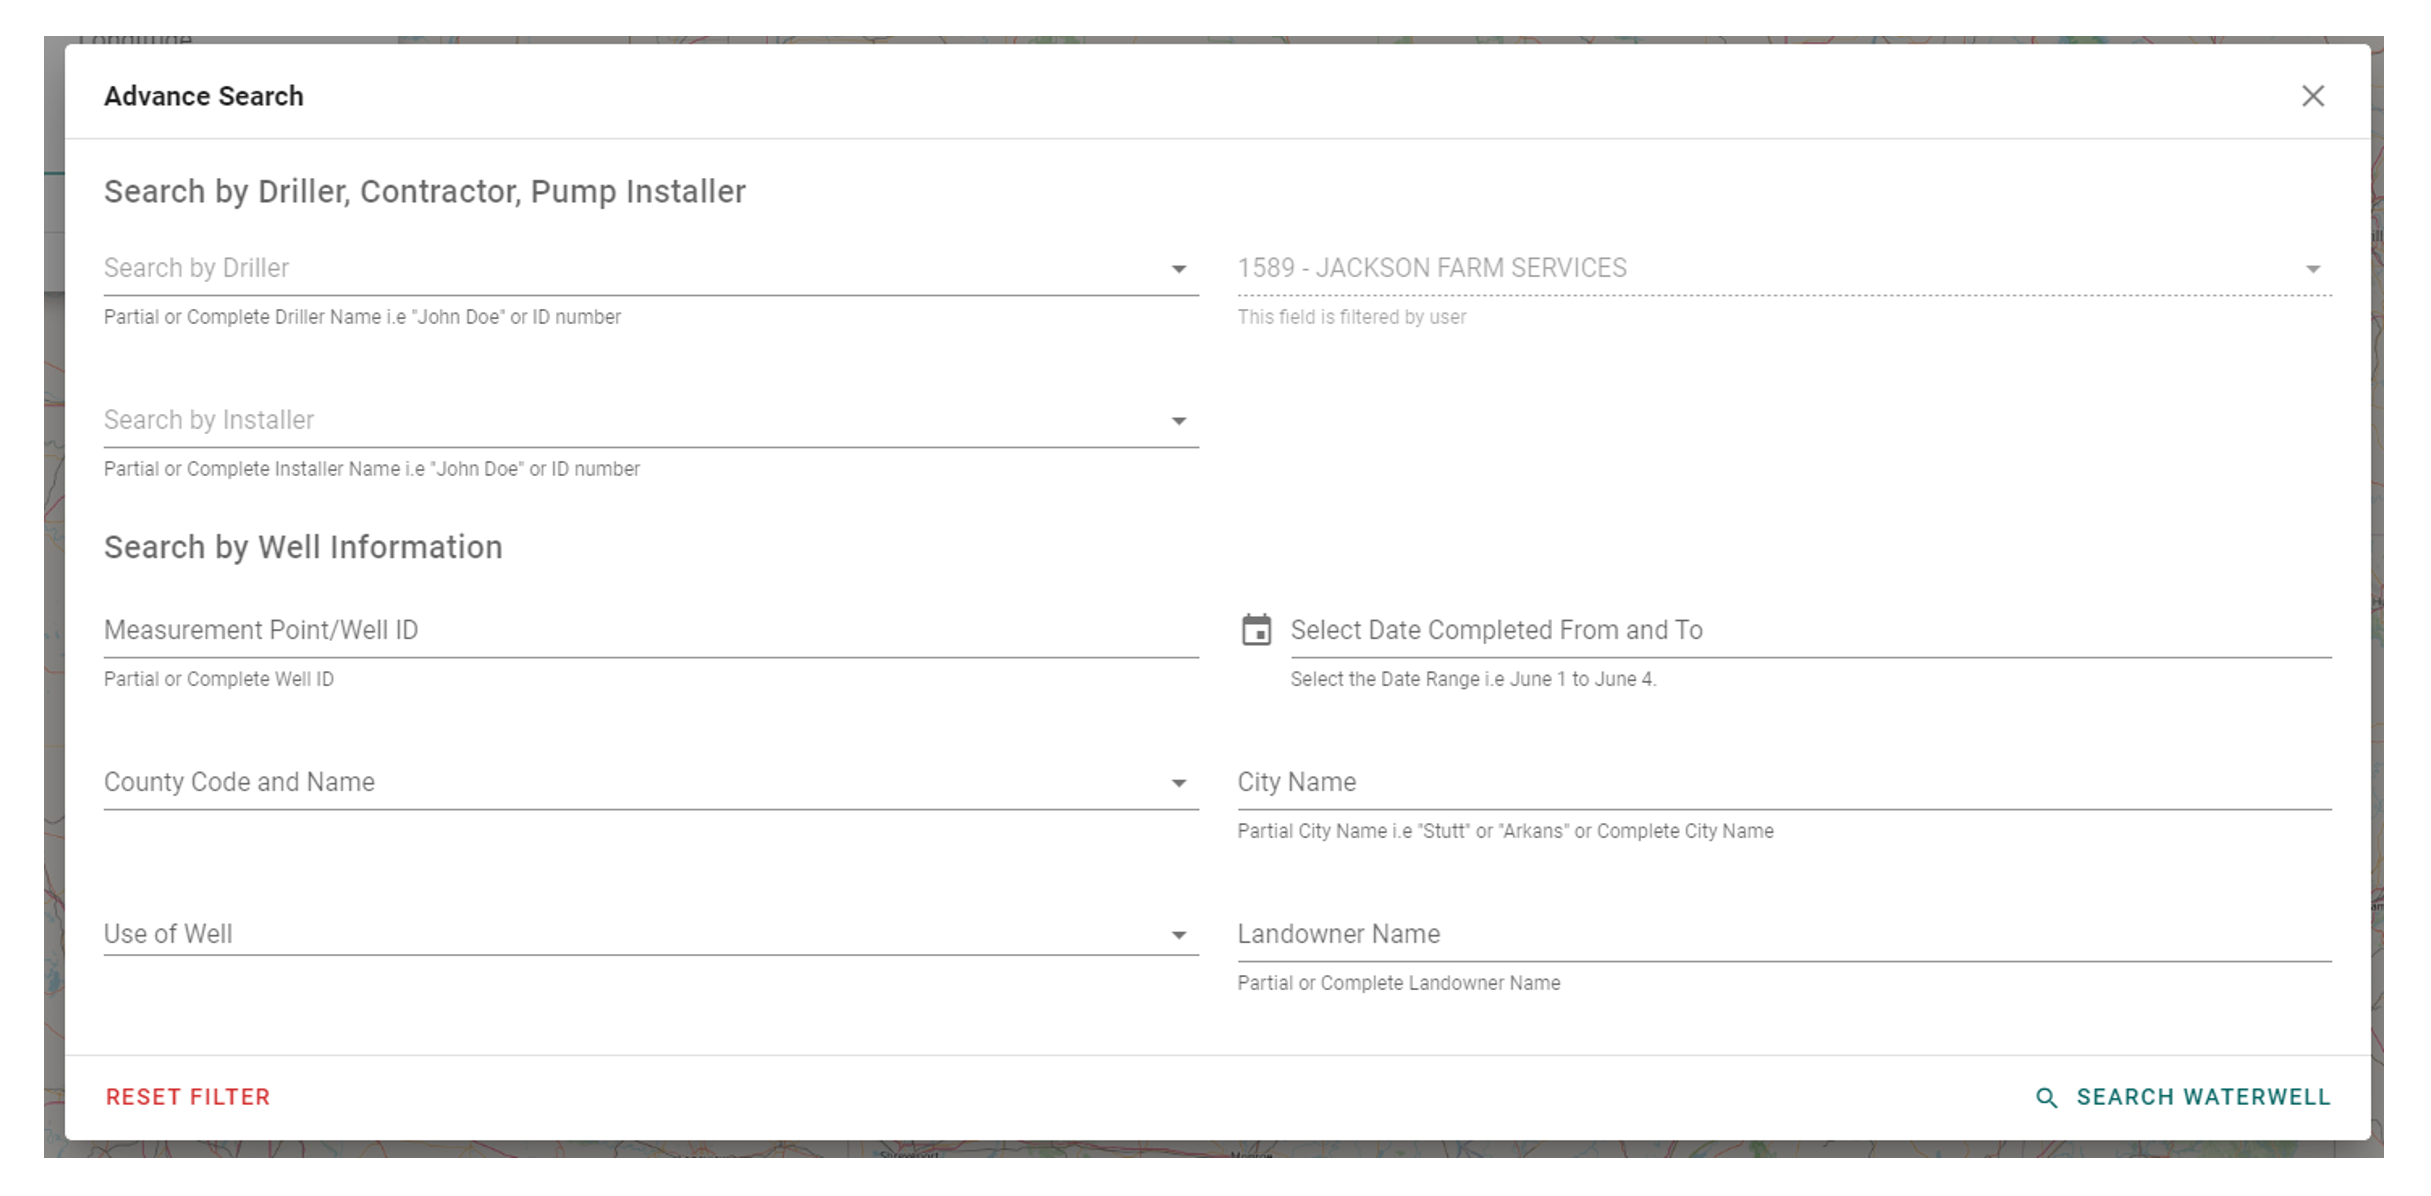
Figure 9
- To further refine your search, click on 'Advanced Search' (Figure 9) and specify additional criteria.
- Click on 'Search Waterwell' to complete your request.
- To search within your current view, click on 'Search This Area' at the bottom of the screen.
Search Using the Drawing Tool
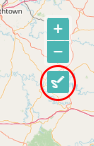
Figure 10
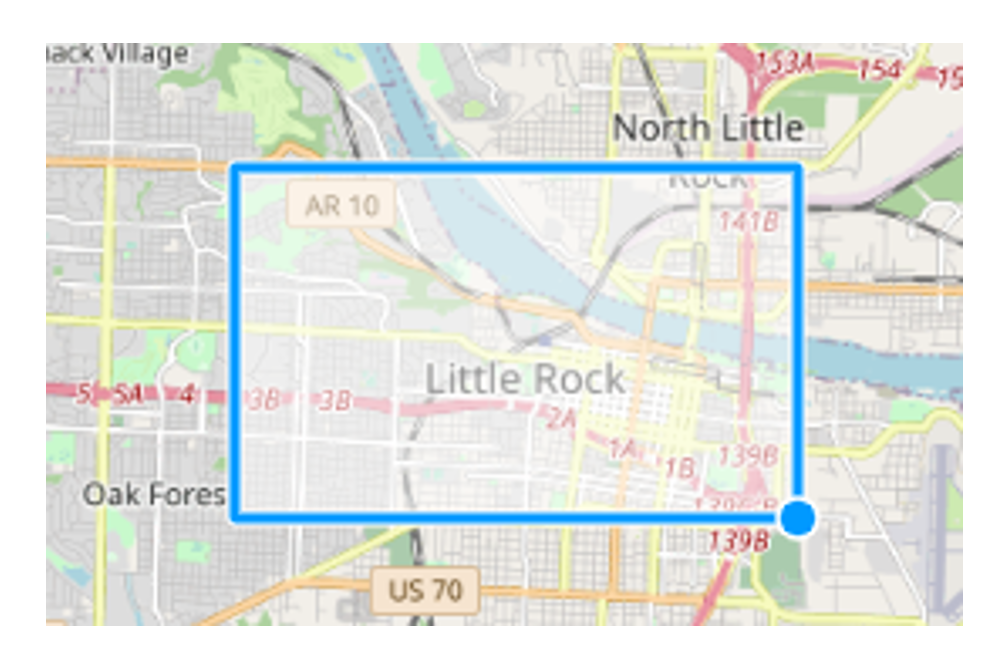
Figure 11
To draw your own map area for searching, follow these steps:
- Click on the drawing tool icon located at the top right of the screen (Figure 10).
- Click on the map to set your first point, then drag your mouse horizontally to capture the desired area (Figure 11).
Viewing Wells
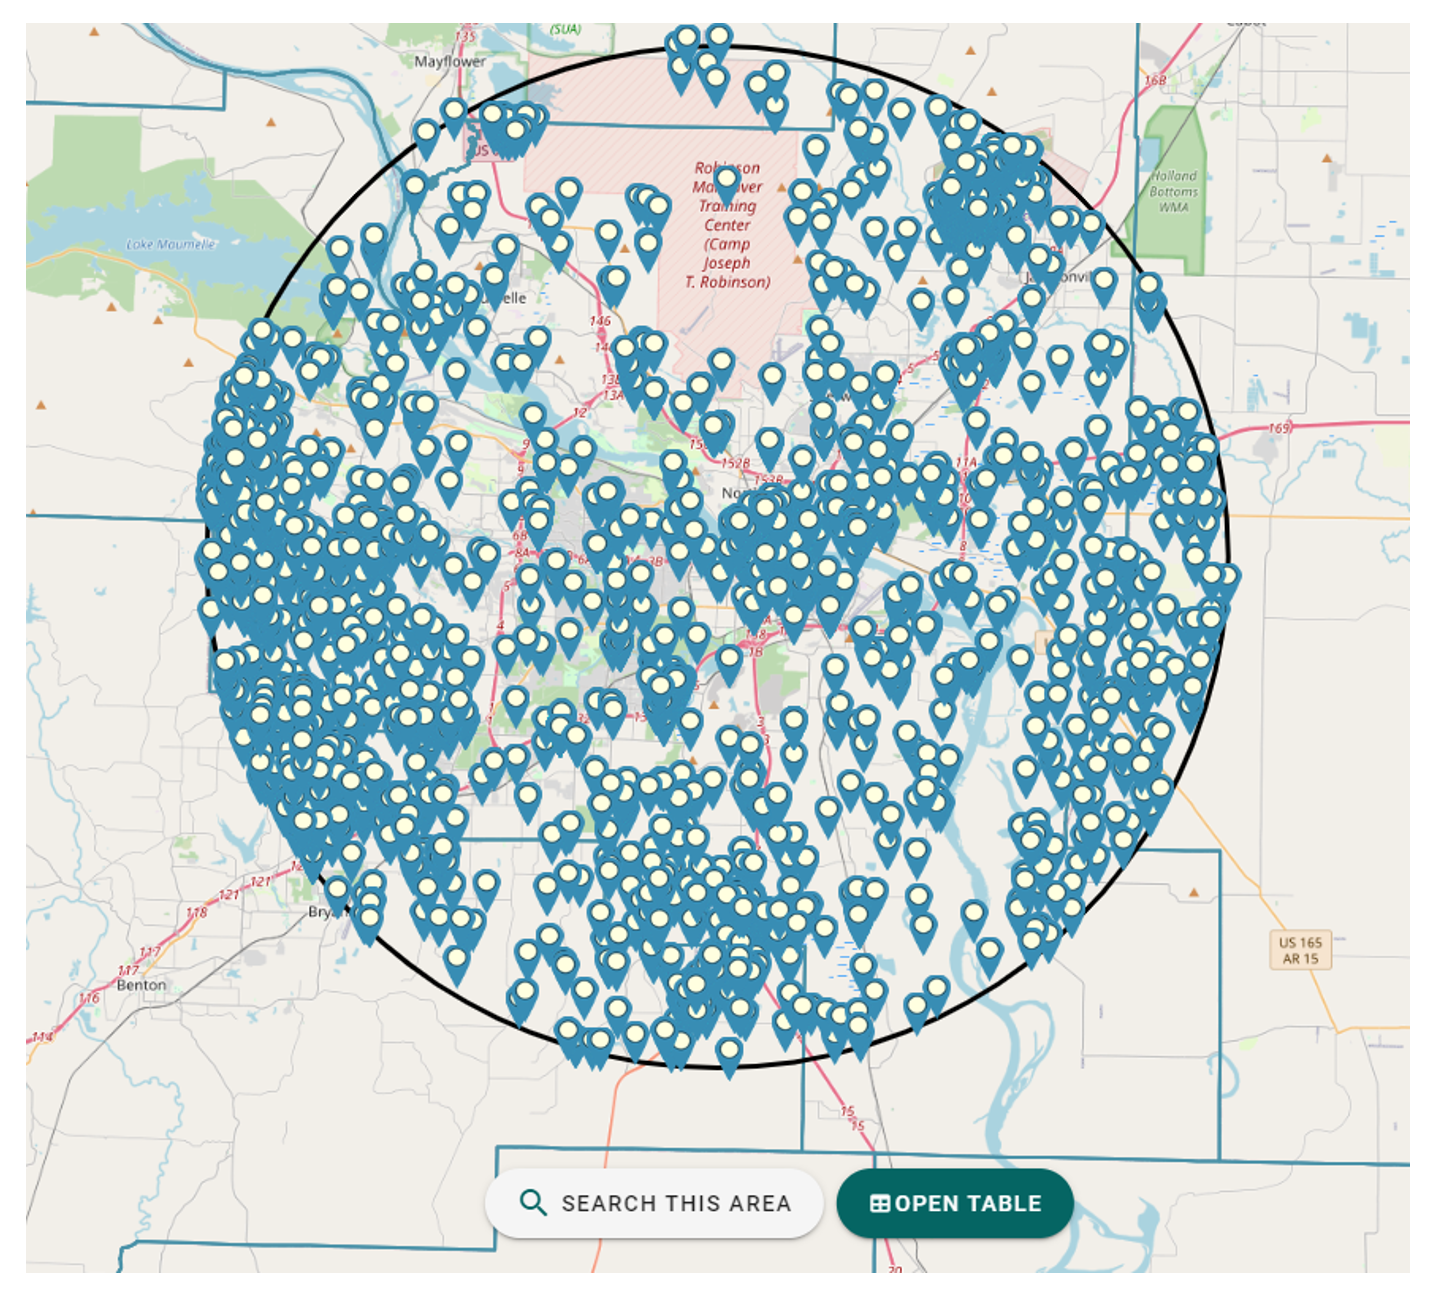
Figure 12
Upon completing a search, you will see all available well points in your desired area (Figure 12). To view a single well, click on its point (Figure 13). When you click on a well, you can see its information. To view the well's information in Table View, click on 'Filter'. To view the full well report, click on 'Report' at the bottom right of the well information. To view the well in the table, click on 'Table'.
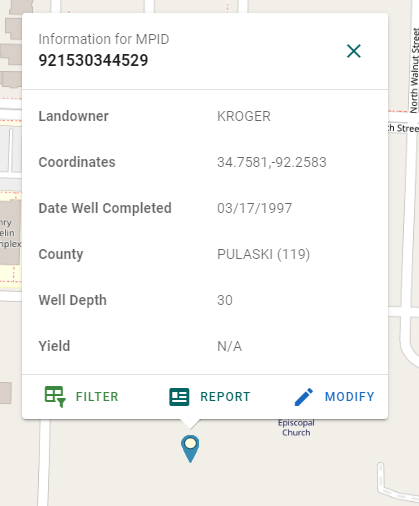
Figure 13
Viewing Wells in the Table
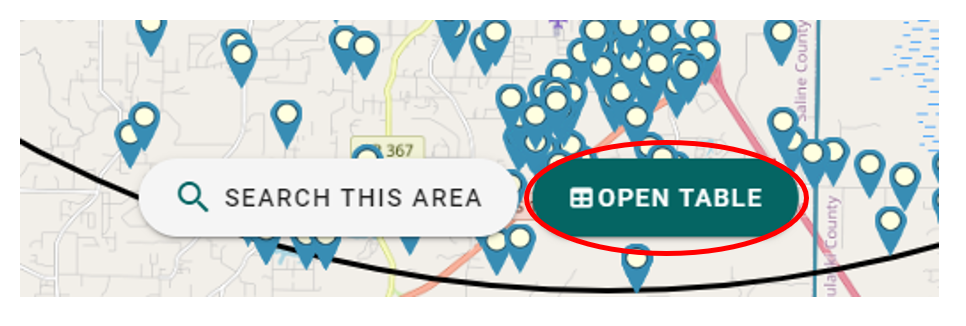
Figure 14
To view all wells in a table format, use the following steps:
- Click on 'Open Table' at the bottom of the screen (Figure 14).
- In the table view, you can search for specific wells, apply filters, and export the table in different file formats (Figure 15).
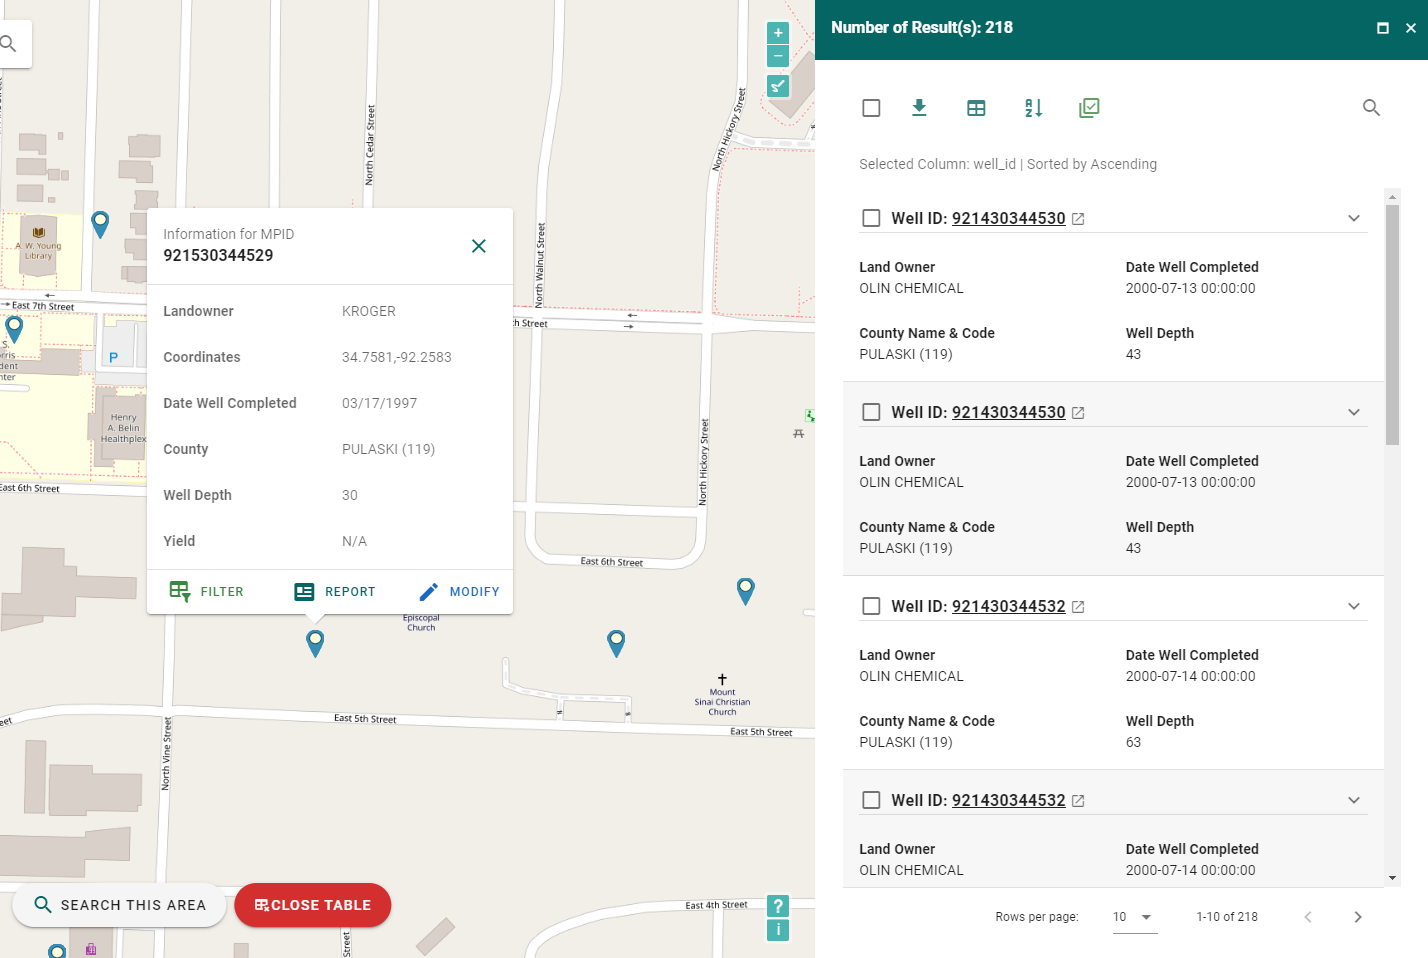
Figure 15

Figure 16
- To access more information about a well, click the arrow under 'Actions' next to the well (Figure 16). You can then locate the well on the map or view the well report.
Clearing the Map and Quick Actions
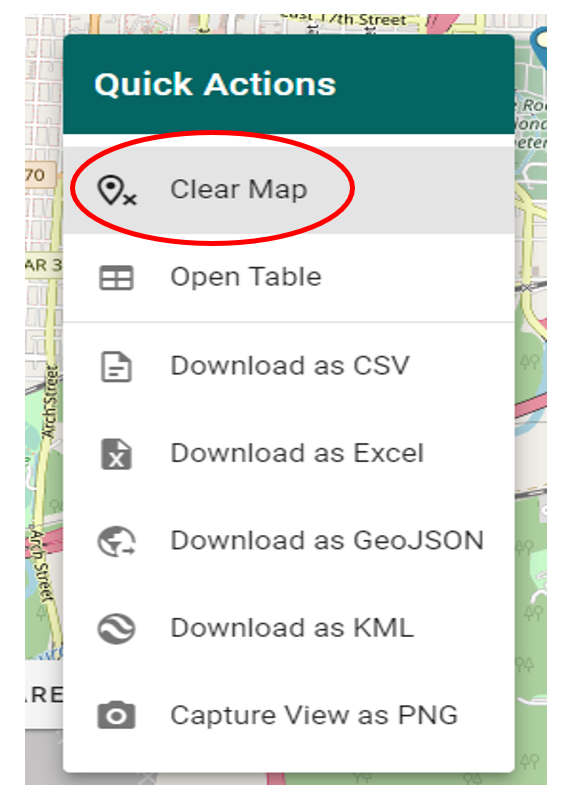
Figure 17
To clear the map, right click anywhere on the map to see the 'Quick Actions' box (Figure 17). Click on 'Clear Map' to clear.
Other actions include 'Open Table', downloading as different files, and taking a screenshot (Figure 17).
Adding a New Well
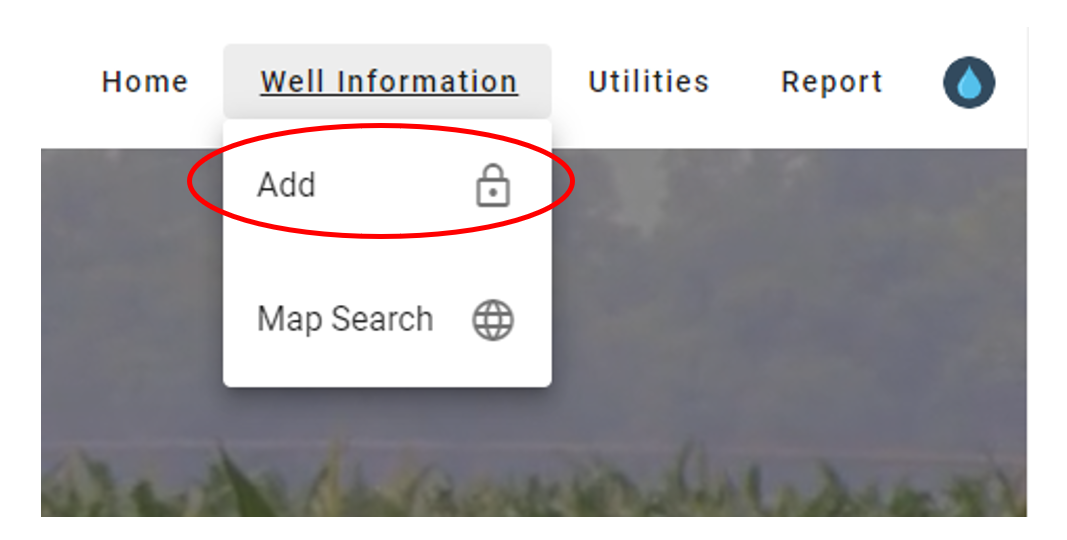
Figure 18
To add a new well, from the home page, click on 'Well Information' and then click 'Add' (Figure 18). Then you must input the coordinates or use 'Find My Location' to find the area of the well (Figure 19).
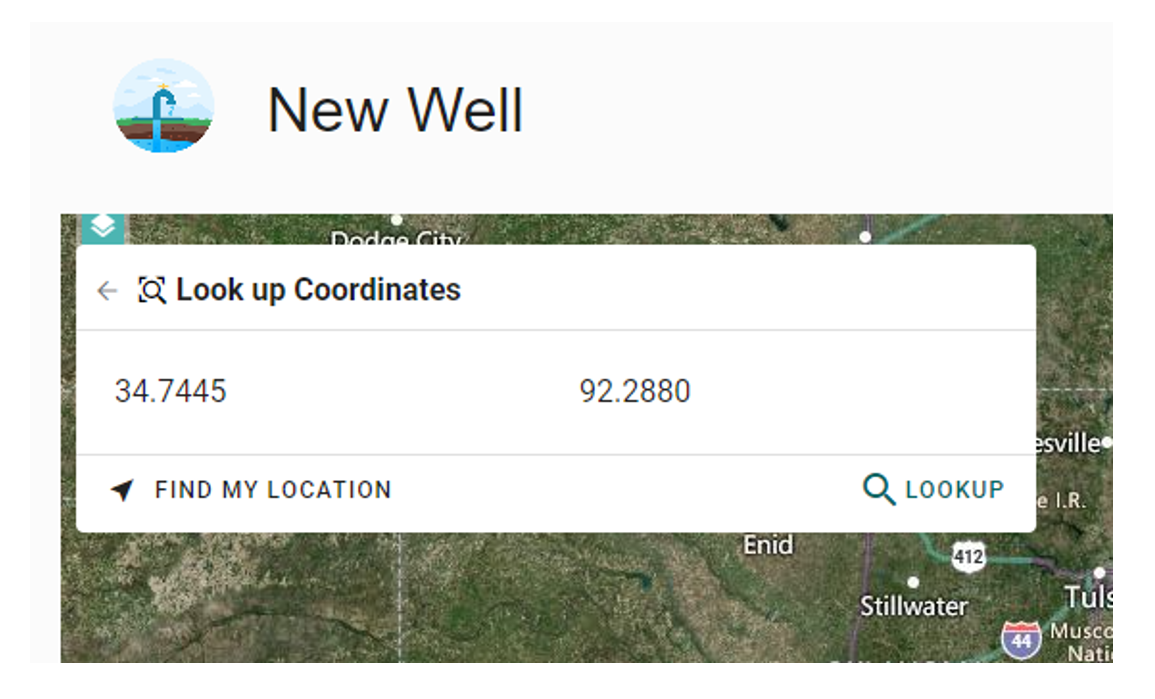
Figure 19
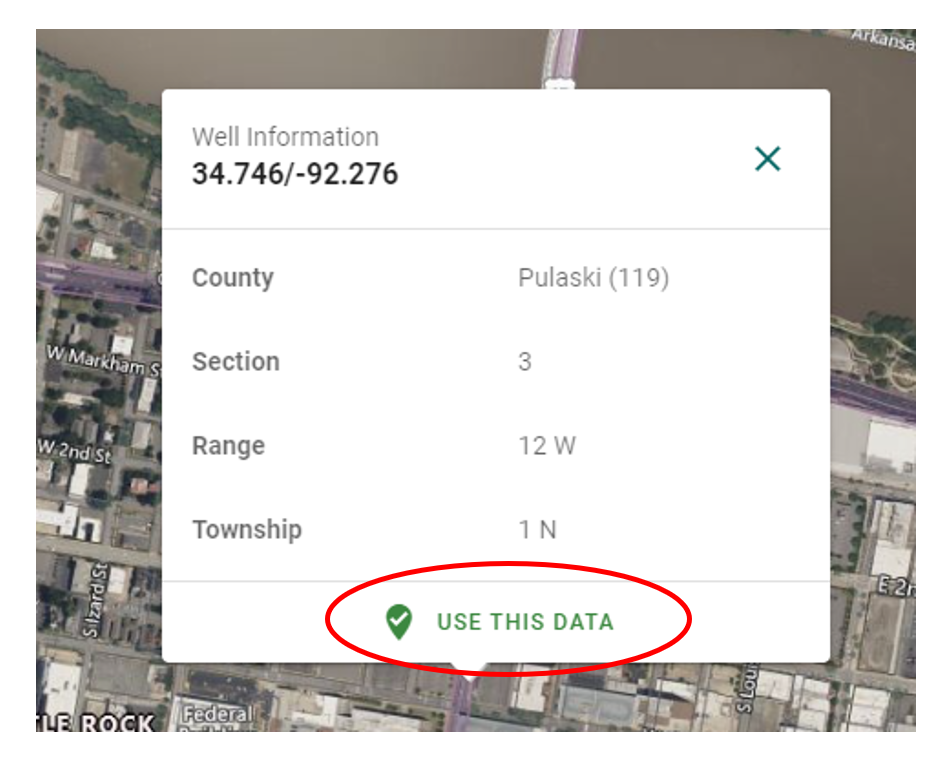
Figure 20
Once you find the well point needed, click 'Use This Data' (Figure 20). Then, fill in the Well Information Section. Be sure to input all of the required (**) information (Figure 21).
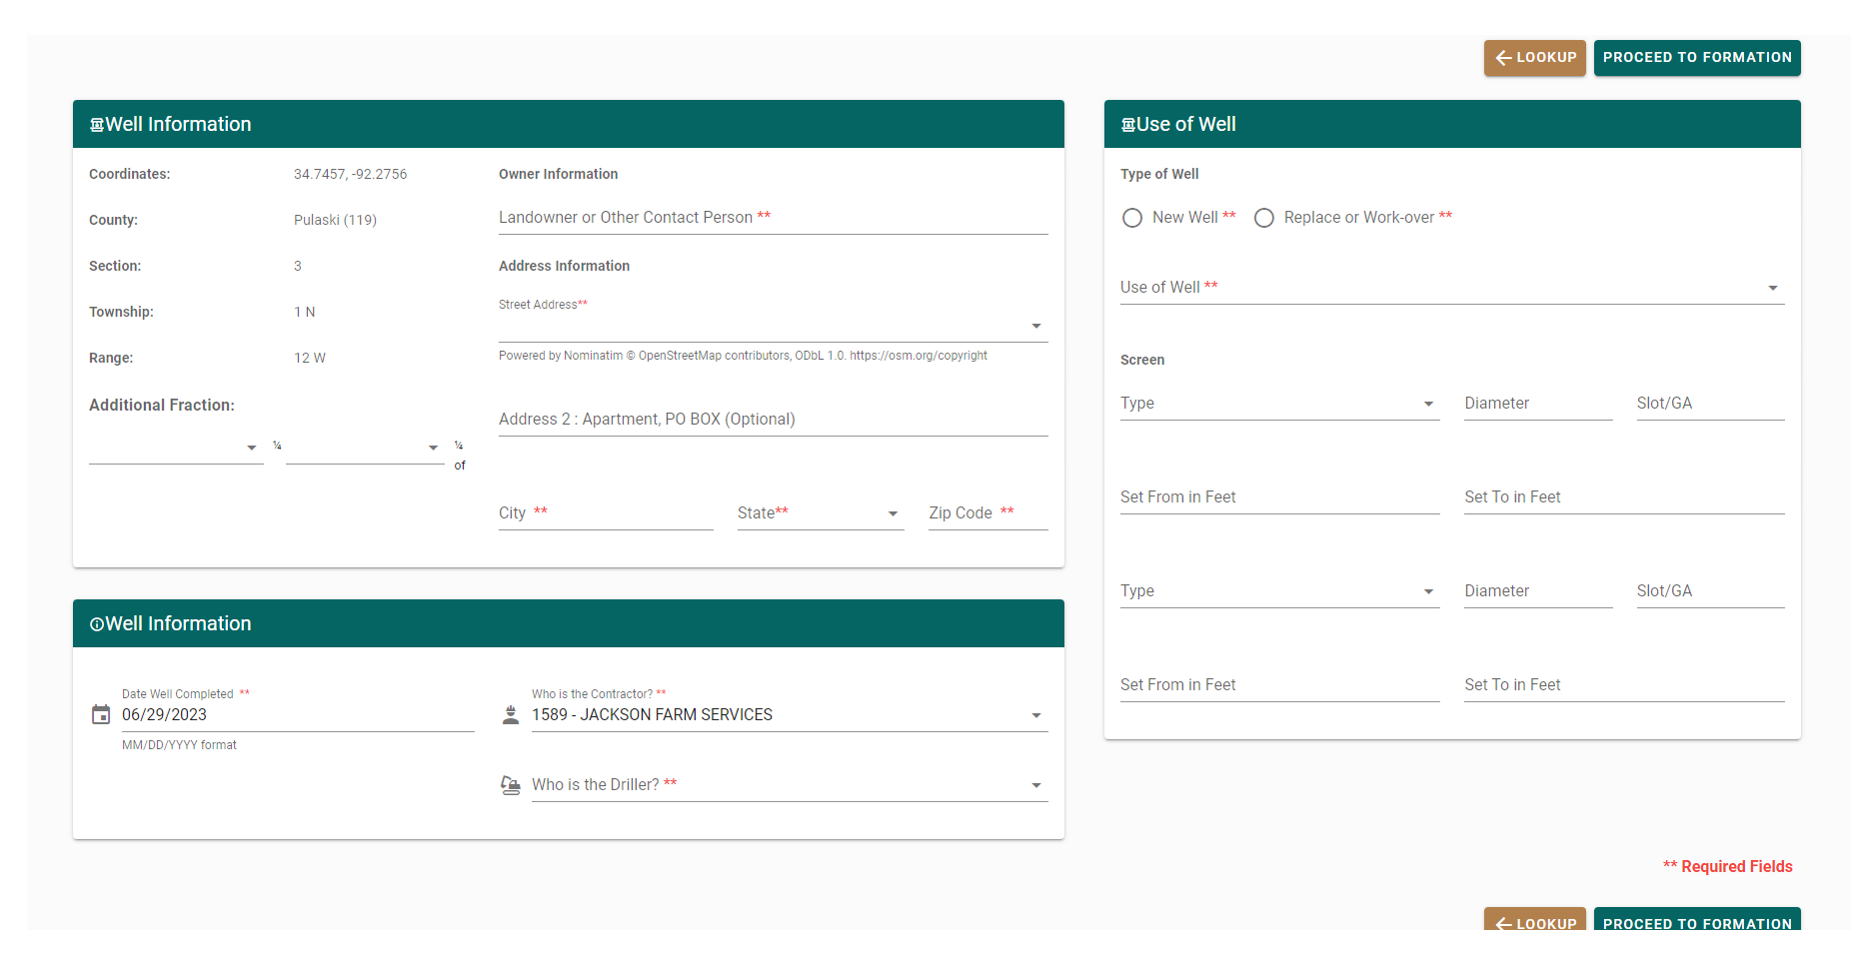
Figure 21
Then enter all the formation information (Figure 22). You can also add a pump report.

Figure 22
After you've filled in the information, review the new well and save the well information (Figure 23)!
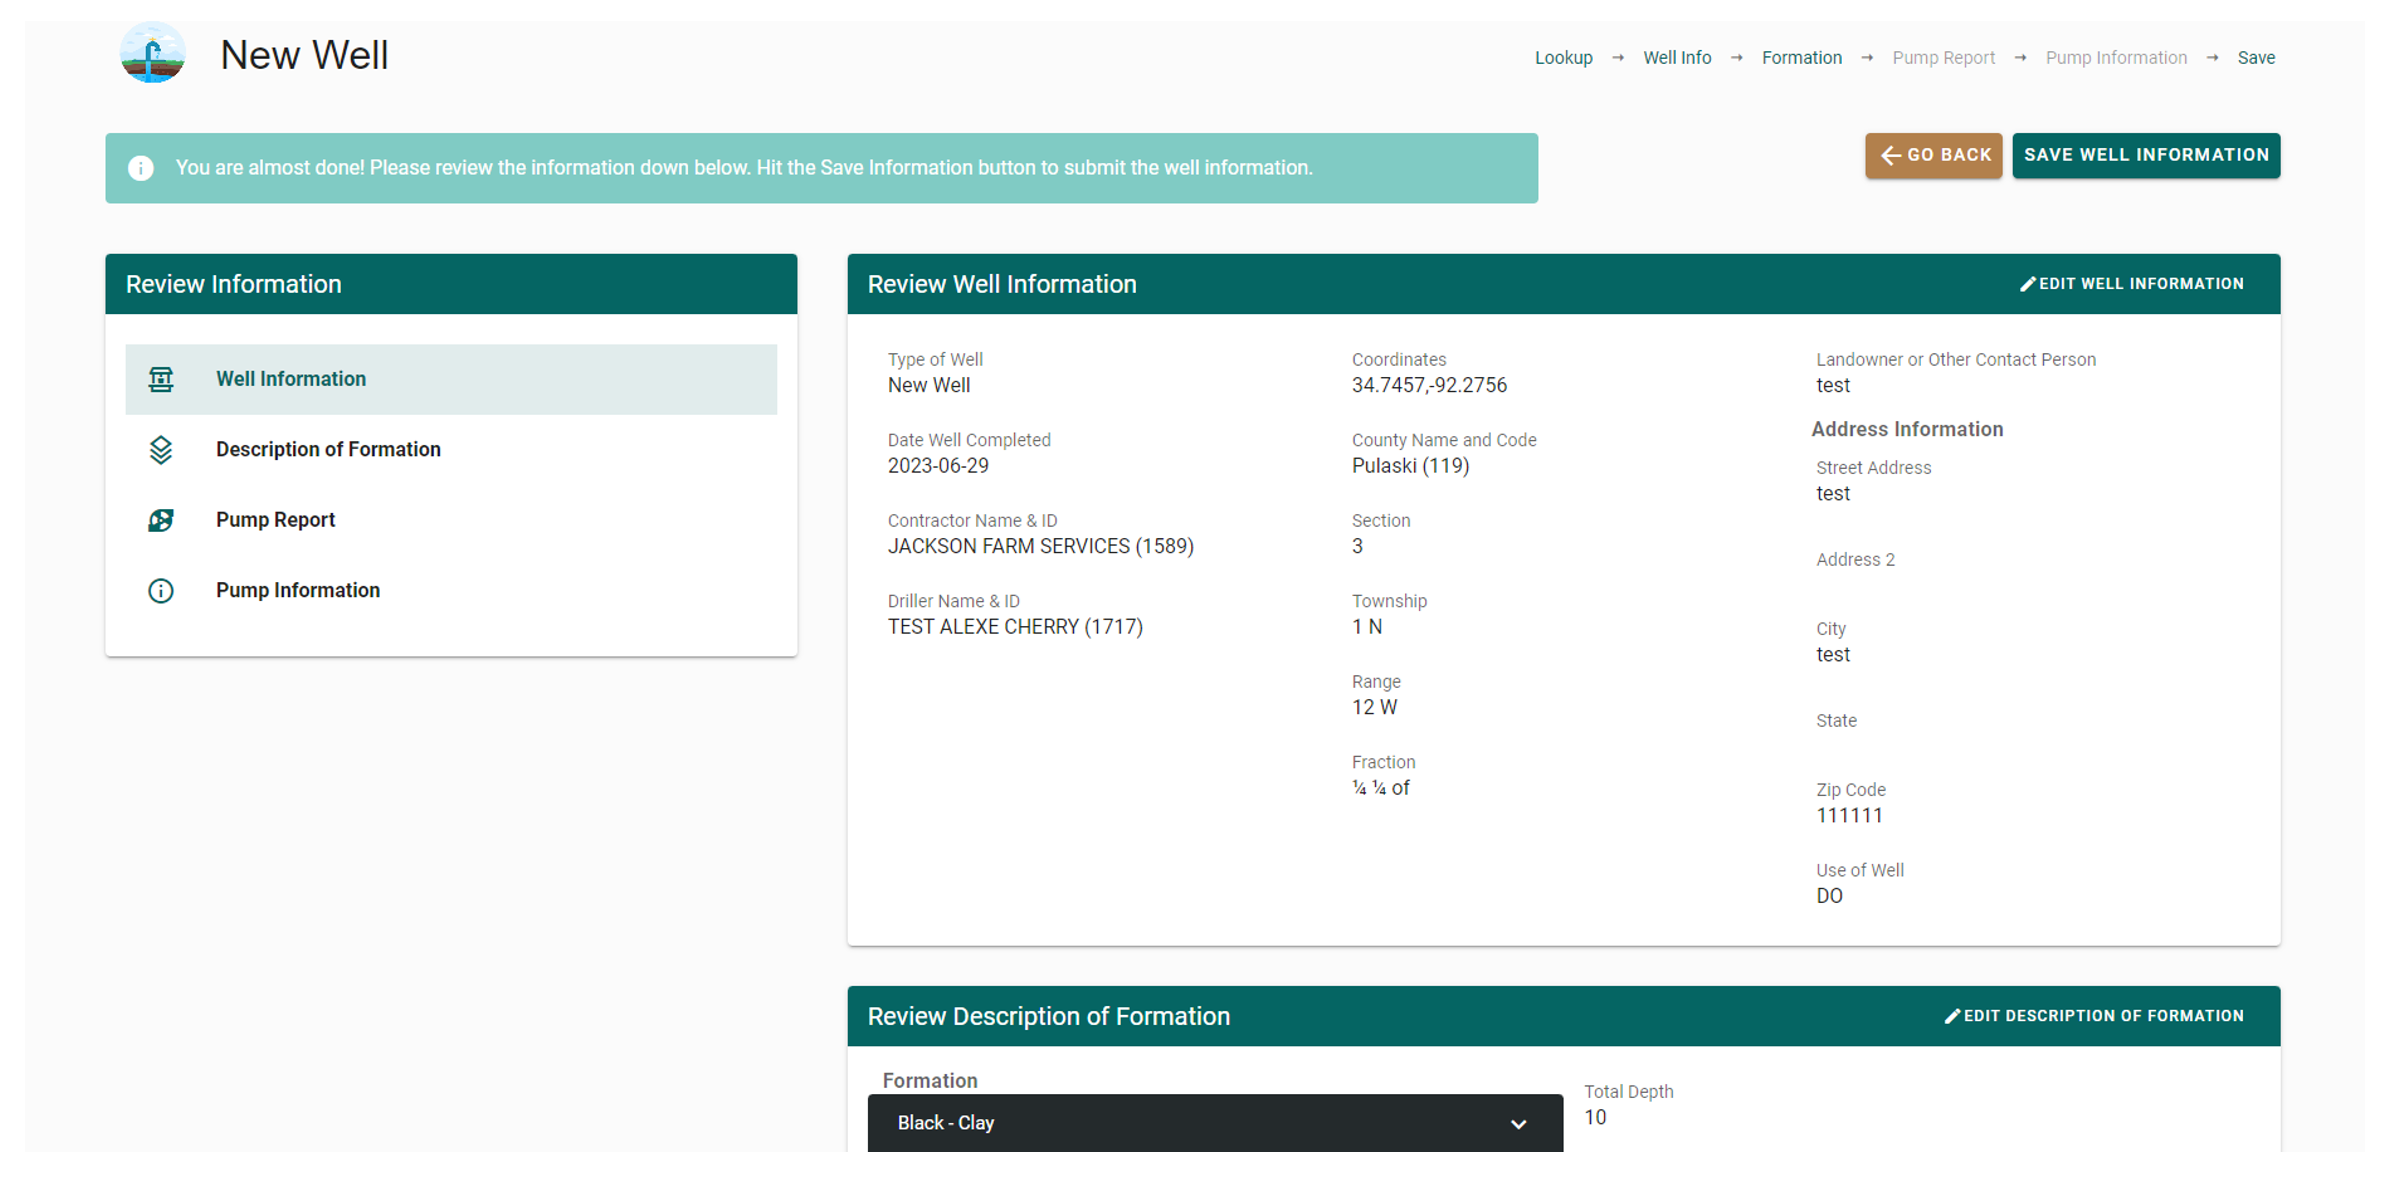
Figure 23
By following these instructions, you will be able to effectively use the Waterwell mapping tool to search for wells and add new wells to the system.
If you have any further questions or need assistance, please refer to the help documentation or contact our support team at [email protected]